
Tracking and Receiving Transfers
Once a transfer has been created, the Transfers screen is where you follow it through its life: dispatch it from the source, watch it in transit, and record what actually arrives at the destination.
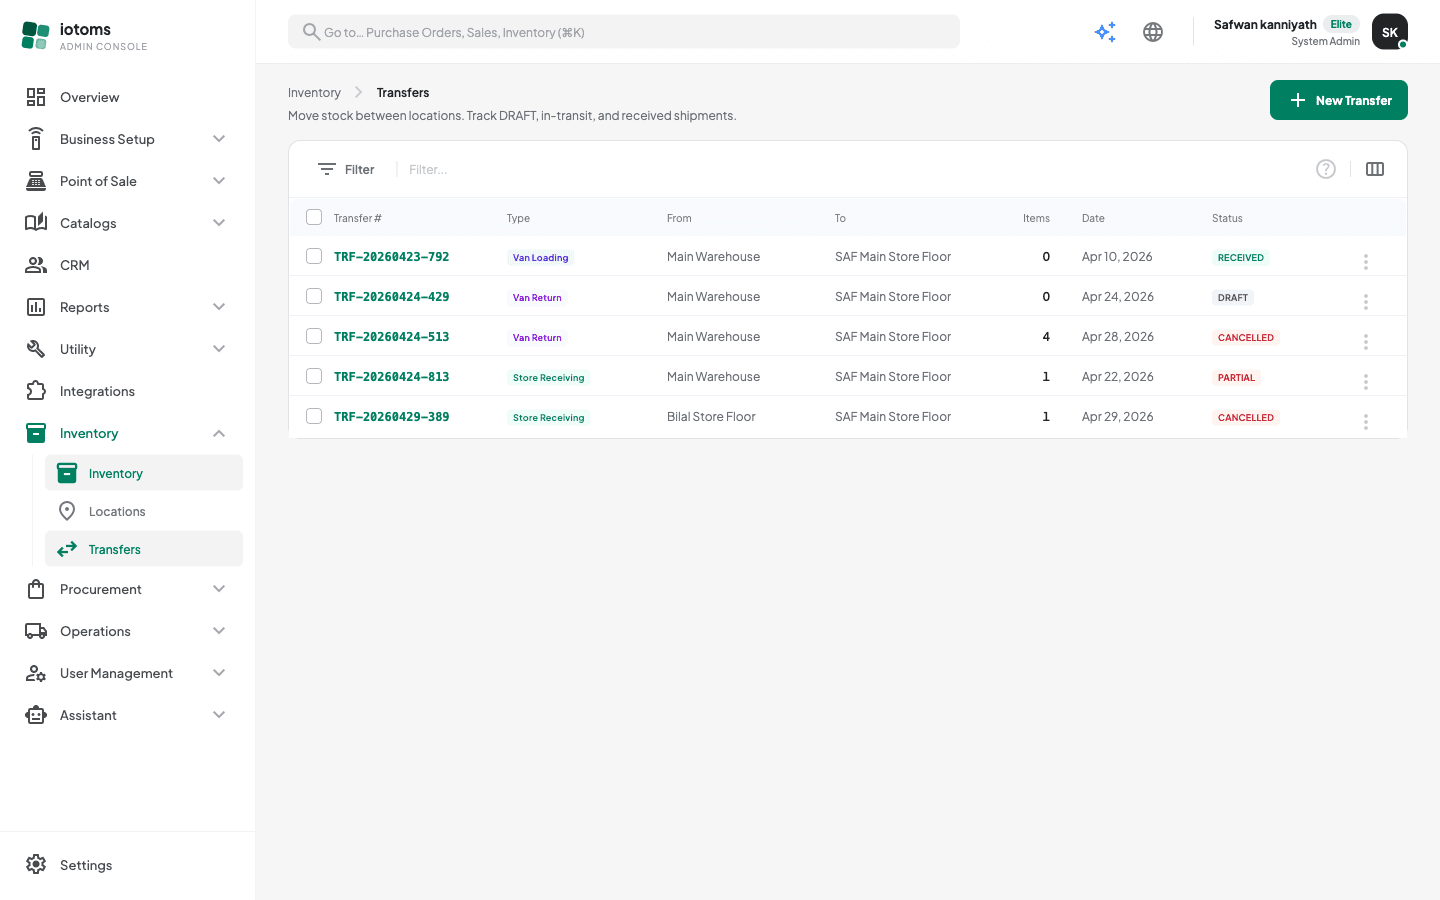
The transfer lifecycle
Every transfer moves through these statuses:
- DRAFT — being set up; items can still be added and the transfer can be cancelled.
- CONFIRMED / IN_TRANSIT — dispatched: stock has been deducted from the source location and is on its way.
- RECEIVED — everything dispatched arrived and was confirmed at the destination.
- PARTIAL — received, but with a variance between dispatched and received quantities.
- CANCELLED — a draft that was voided before any stock moved.
Finding a transfer
- Open Items → Transfers from the sidebar. Each row shows the Transfer #, type, From and To locations, item count, date, and a Status badge.
- Click the Filter button to narrow by Status, Transfer Type, or tick Only in-transit transfers to focus on stock currently on the move.
- Click a Transfer # (or ⋮ → View details) to open the transfer's detail page, which shows a status timeline, the route, summary totals (requested, dispatched, and received units), and the full item table. A Show me how link at the top replays the guided tour.
Dispatching a transfer (Confirm & Dispatch)
- Open the transfer (or use the row's ⋮ actions menu on the list) and choose Confirm & Dispatch. This is only available for DRAFT or CONFIRMED transfers.
- A confirmation dialog warns that stock will be deducted from the source location and the transfer set to IN_TRANSIT — this cannot be undone.
- Click Confirm & Dispatch. The detail page now shows an in-transit banner until the destination receives the shipment.
Receiving a shipment
- Open the transfer's detail page and click Receive Shipment (available while the transfer is confirmed or in transit).
- The Receive Transfer dialog lists every item with its dispatched quantity and an editable Received Qty, pre-filled with the dispatched amount:
- If everything arrived intact, click Mark all as received (or just leave the pre-filled values).
- If something is short or over, type the actual quantity — the Variance column updates as you go, and the footer tells you whether the transfer will be marked RECEIVED (no variance) or PARTIAL (variance found).
- Optionally add Receiving notes — condition, carrier details, or discrepancy context.
- Click Confirm Receipt. Received quantities are added to the destination location, and any differences appear as amber Variance figures on the transfer's item table and summary.
Receiving twice, and receiving the rest
The received quantity you enter is the running total for that line, not an extra amount on top.
- Receiving the same shipment twice with the same figures adds nothing the second time. Stock is not doubled.
- To record the rest of a short shipment later, open the transfer again and enter the new total received for that line — not the difference.
- You cannot receive more than was dispatched. Entering a larger figure is refused: an overage is a different problem from a transfer, and inventing stock here would hide it.
Cancelling a transfer
Only DRAFT transfers can be cancelled — no stock has moved yet, so nothing needs to be reversed.
- From the list row's ⋮ actions menu or the transfer's detail page, choose Cancel Transfer.
- Confirm in the dialog. Cancellation cannot be undone; the transfer stays in the list as CANCELLED for the record.
To undo a transfer that was already dispatched, receive it and then create a new transfer in the opposite direction.