
Creating a Role
A role is a reusable bundle of permissions you assign to users. Create one role per job function ("Warehouse Supervisor", "Finance"), not one per person.
Steps
- Open Admin → Roles from the sidebar.
- Click Add role.
- Fill in the Role details card:
- Role name (required) — the human-friendly name shown everywhere, e.g.
Sales Executive. - Role key (required) — a technical identifier, e.g.
SALES_EXECUTIVE. Type anything; it is automatically cleaned up to UPPERCASE_WITH_UNDERSCORES when you leave the field. - Status — Active or Inactive. Only create the role as Inactive if you're preparing it for later.
- Role name (required) — the human-friendly name shown everywhere, e.g.
- In the Permissions card below, pick a starting point with the Start from dropdown:
- By default the checklist is pre-filled as a clone of an existing role's permissions — pick whichever existing role is closest to what you need.
- Choose Blank to start with no permissions at all.
- Fine-tune the checklist: tick or untick individual features, use All / None per category, or Select all / Clear all for everything. The Summary card on the right shows how many permissions are selected.
- Changes are tracked by the amber unsaved-changes bar at the top — click Save there. The role and its selected permissions are saved together in one go.
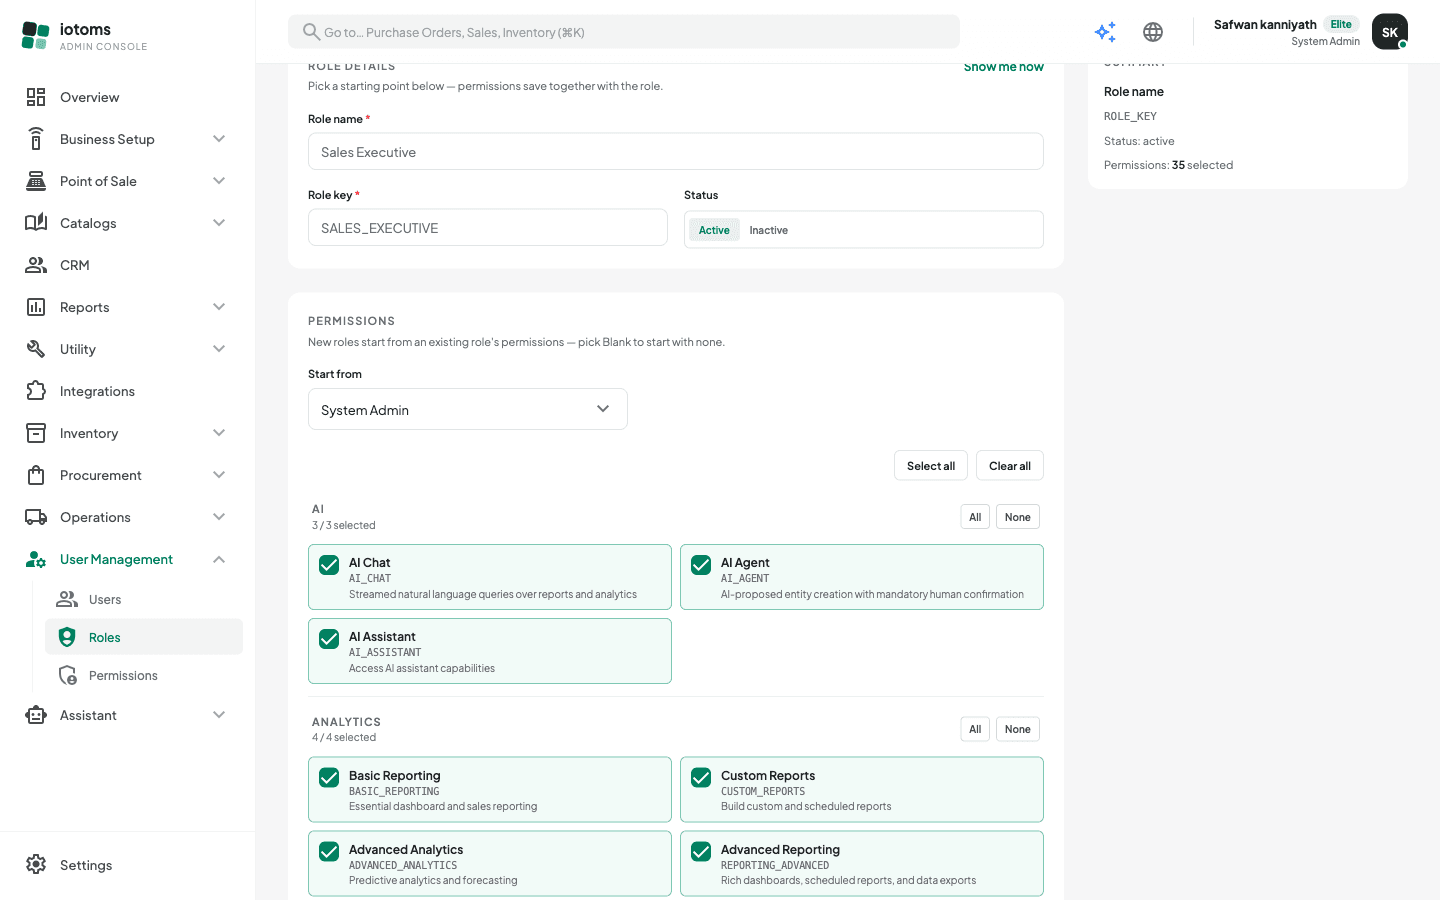
New to this screen? Click Show me how at the top of the Role details card for a short guided tour.
Editing a role later
From the Roles list, click the role's name (or the row's ⋮ → Edit). The edit form only covers the role's name, key, and status — its permissions are managed on the Permissions page instead; see Assigning Feature Permissions to a Role.
A note on empty roles
If you save a role with zero permissions (the toast will say "Role created — no permissions assigned yet"), any user assigned to it can sign in but will see nothing. Assign permissions before adding users to the role — see Assigning Feature Permissions to a Role.