
Assigning Feature Permissions to a Role
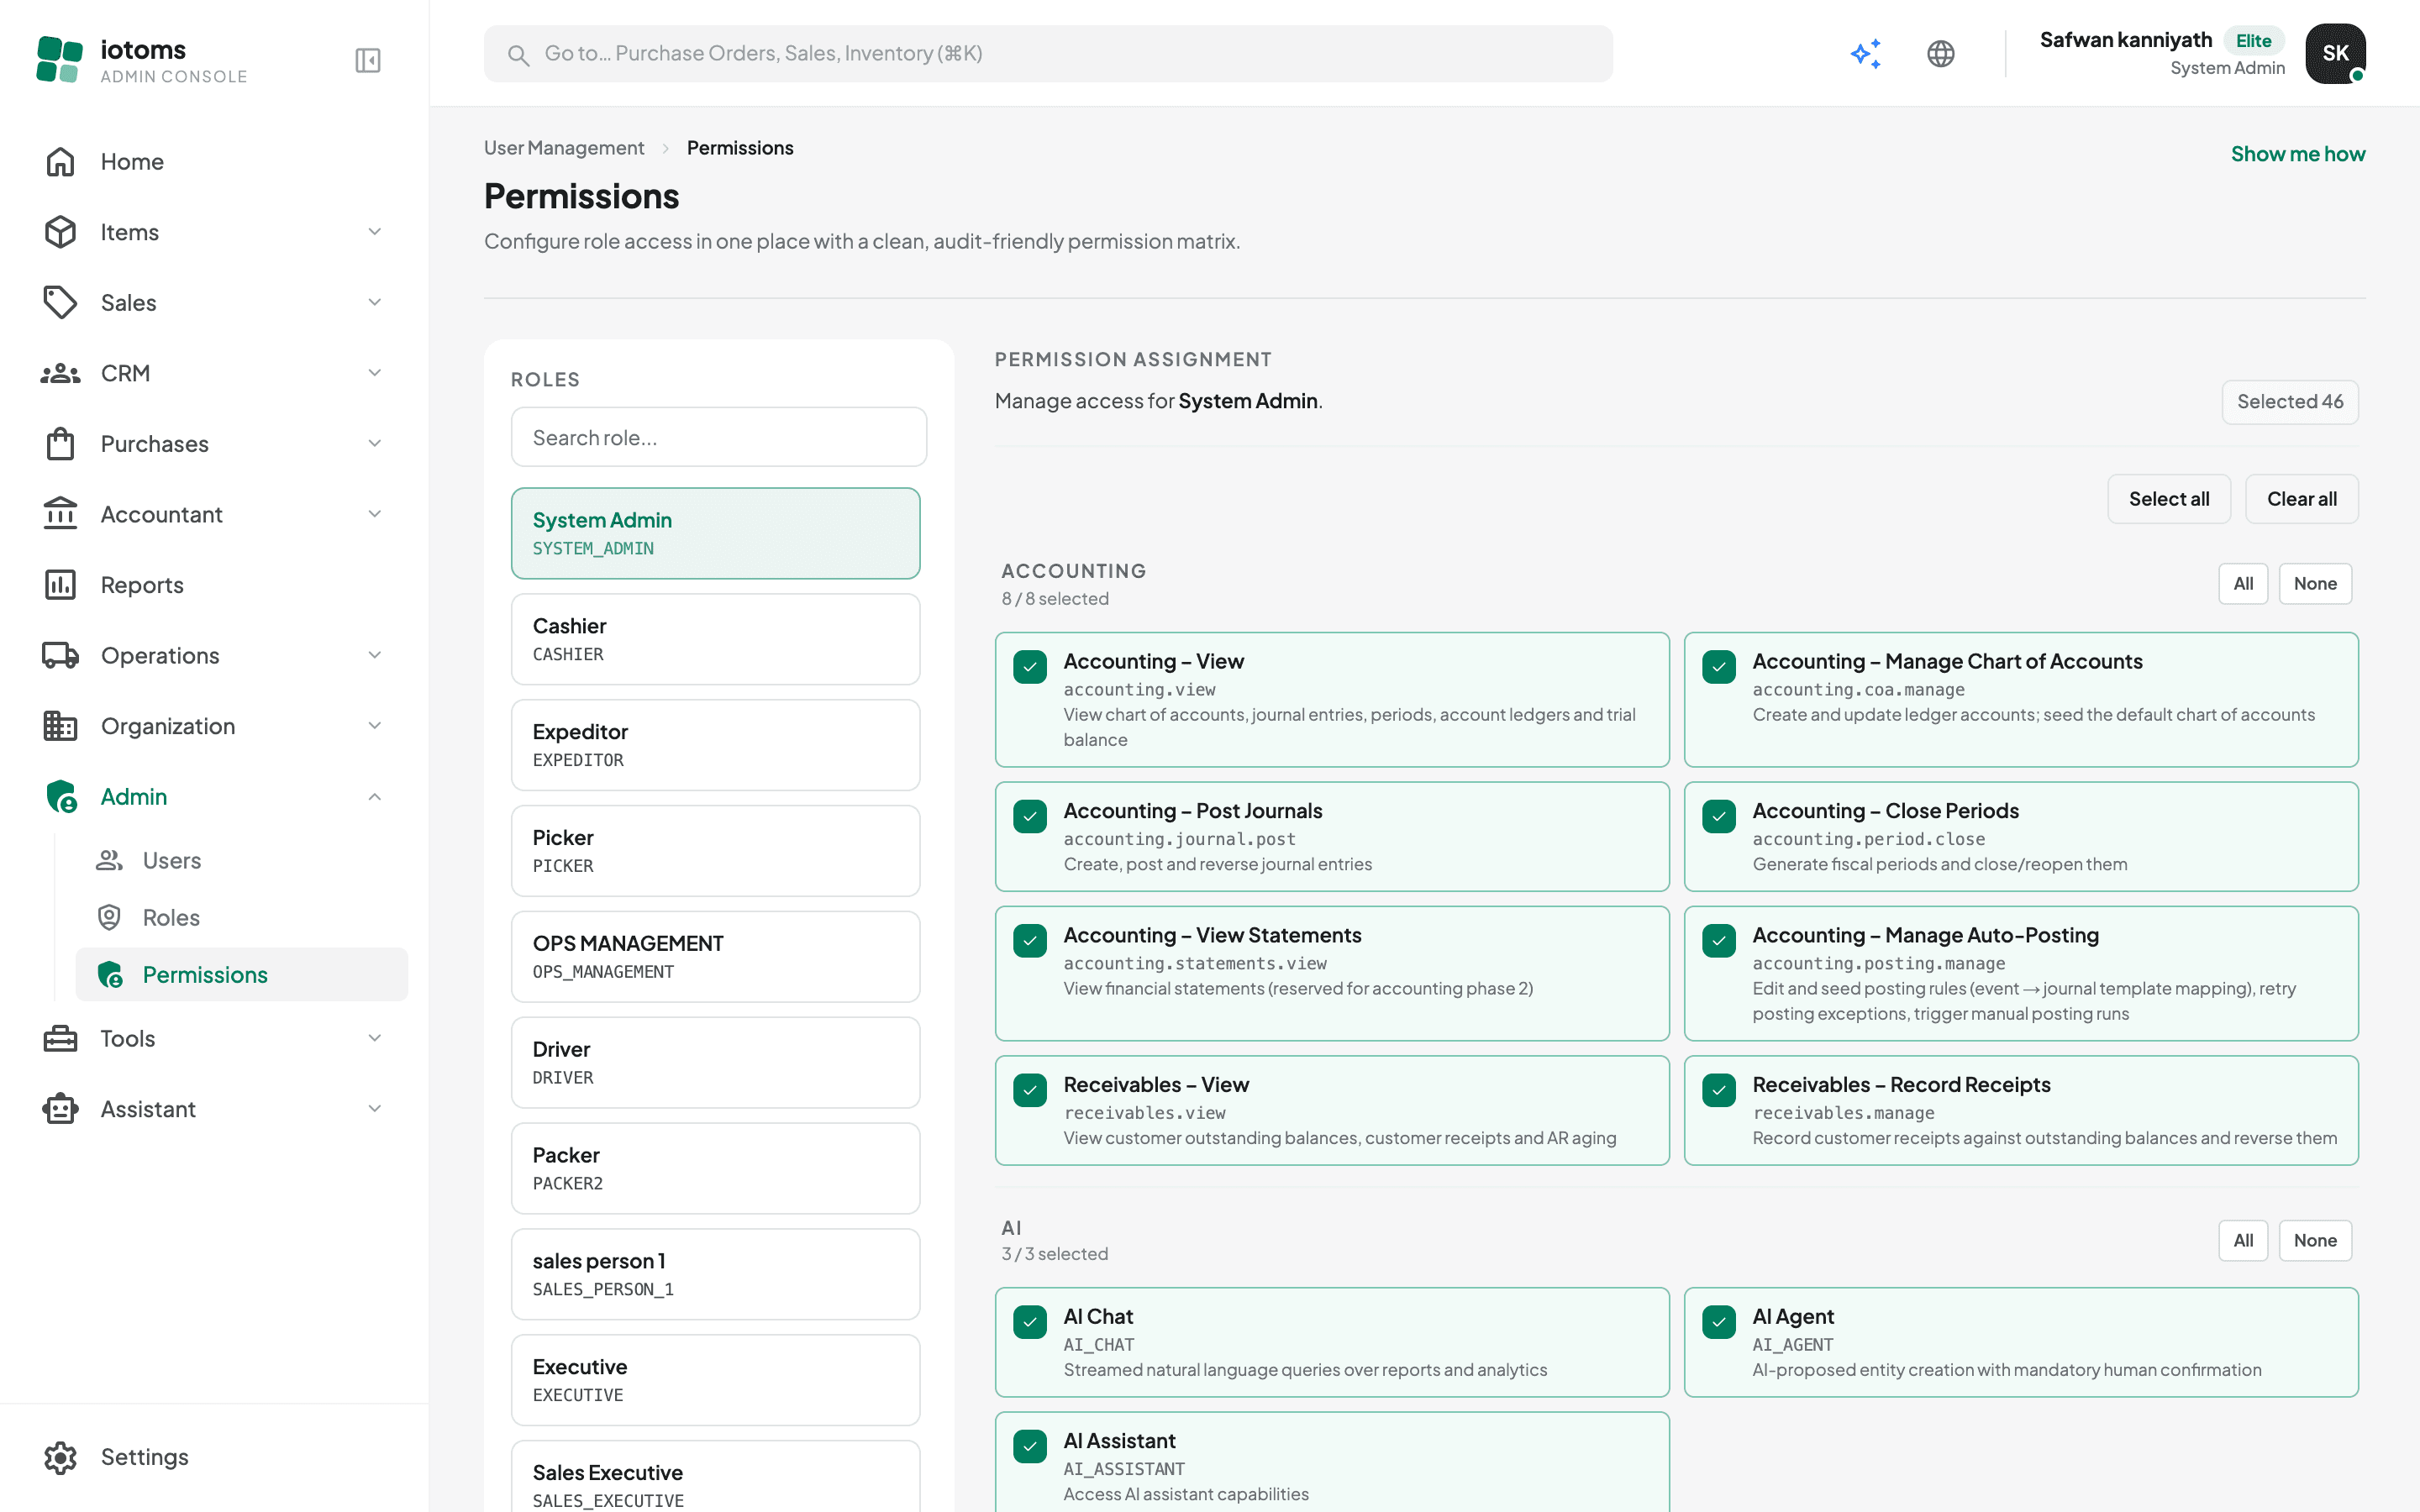
The Permissions page is where you control exactly which features each role can use. Every checkbox is a feature of the portal (Items, Reports, Operations, and so on) — checked means users with that role can see and use it; unchecked means it's completely hidden from them.
Steps
- Open Admin → Permissions from the sidebar.
- Pick a role from the Roles panel on the left (use the search box if the list is long). The first role is selected for you automatically.
- The right-hand panel shows every feature the role could be granted, grouped by category. Tick or untick features:
- Click any feature card to toggle it.
- Use All / None next to a category heading to toggle that whole group.
- Use Select all / Clear all (top right) to toggle everything at once.
- The Selected counter at the top and the "x / y selected" line under each category heading keep a running tally.
- Your edits are tracked by the amber unsaved-changes bar — click Save there to apply them, or Discard to revert.
New to this screen? Click Show me how at the top right for a short guided tour.
When do changes take effect?
Permission changes apply to everyone assigned that role. Affected users pick up the new access the next time they sign in or reload the portal.
Why are some checkboxes locked?
You can only grant a feature that you hold yourself:
- A feature you don't have appears greyed out — you can't grant it to anyone (hover it to see the explanation).
- A role that already has access beyond your own shows an amber lock banner: you can view its permissions but not change them.
This prevents anyone from handing out more access than they have. If you need to grant something you don't hold, ask an administrator with wider access to do it.
Related pages
- Creating a Role — new roles can be given permissions right on the create form.
- Reviewing Access on the Permissions Page — using this screen to audit who can do what.