
Adding a User
A user is a login account for one member of your team. Every user must be assigned a role, which decides what they can see and do — so make sure a suitable role exists first (see Creating a Role).
Steps
- Open Admin → Users from the sidebar.
- Click Add user.
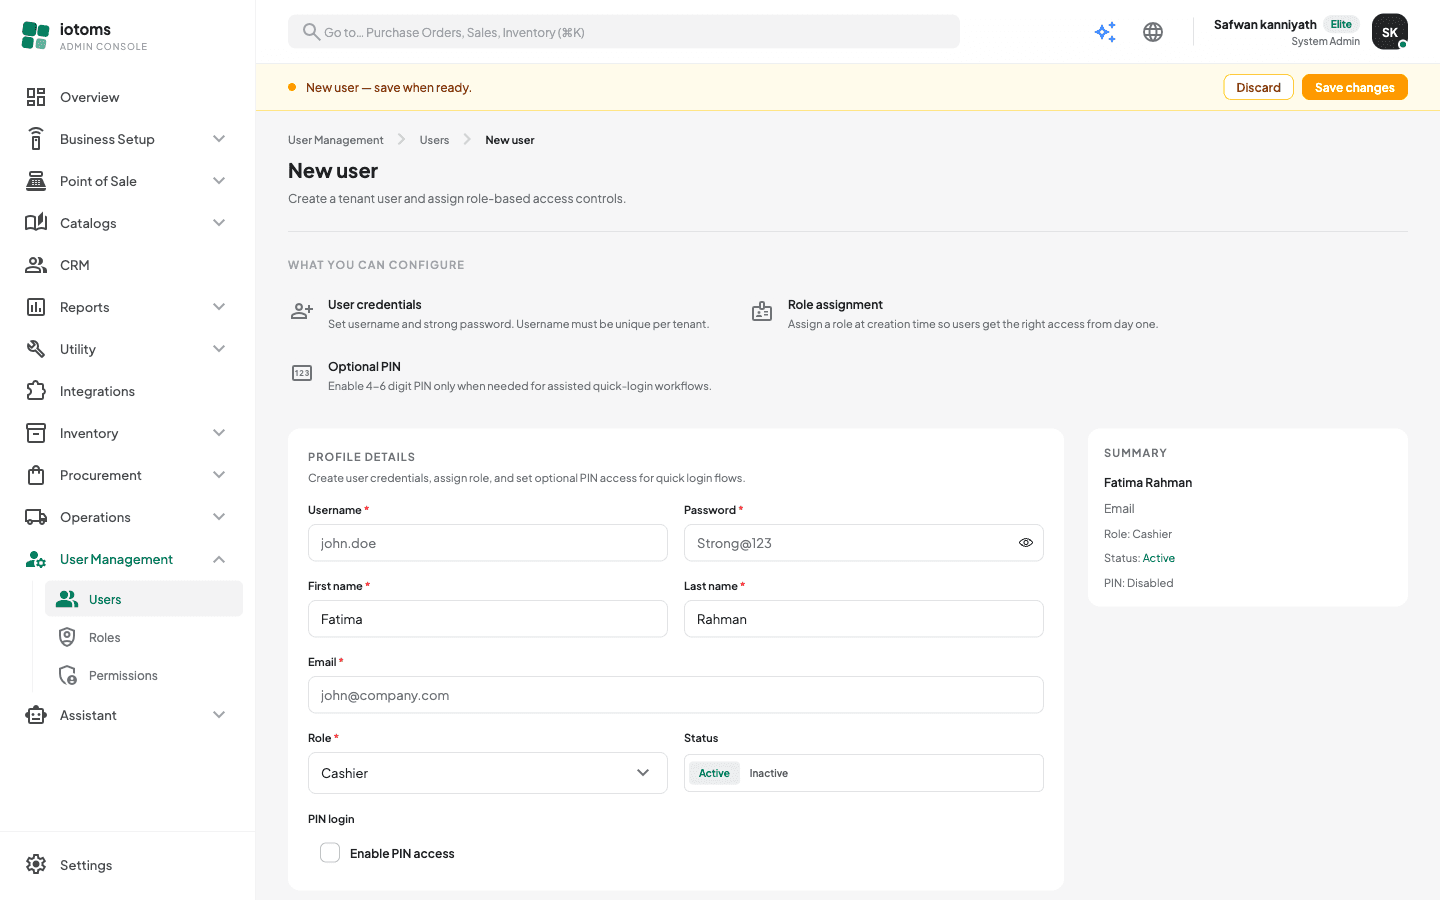
- Fill in the Profile details card:
- Username (required) — at least 3 characters, unique within your business. It cannot be changed later, so choose carefully.
- Password (required) — at least 8 characters, with an uppercase letter, a lowercase letter, a number, and a special character. Only these special characters are accepted:
@ $ ! % * ? & . _ ^ # - First name and Last name (required)
- Email (required)
- Role (required) — pick from your existing roles; the dropdown shows each role's key underneath its name.
- Status — Active or Inactive. Inactive users cannot log in.
- PIN login — optionally tick Enable PIN access and set a 4–6 digit PIN for assisted quick-login workflows on shared devices.
- The Summary card on the right previews the name, email, role, status, and PIN setting as you type.
- Changes are tracked by the amber unsaved-changes bar — click Save there to create the user.
New to the Users screen? Click Show me how on the Users list for a short guided tour.
Before you hand over the credentials
Double-check the role you assigned actually has permissions. A user whose role has none can sign in but will only see a "no access" message — see Assigning Feature Permissions to a Role.